

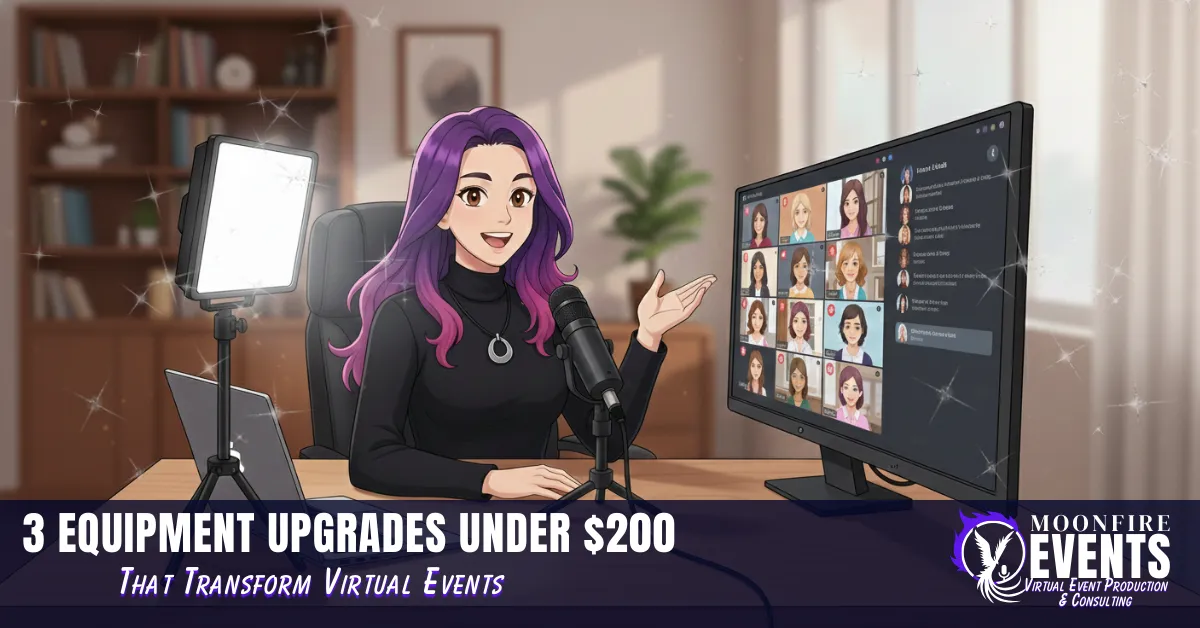
3 Equipment Upgrades Under $200 That Transform Virtual Events
Pricing Note: All equipment prices in this article were verified as of December 15, 2025. Prices may vary by retailer, region, and current sales or promotions. We recommend checking multiple retailers for the best current pricing.
A Quick Note on Hybrid Events: If you're running hybrid events (with both in-person and virtual attendees), your equipment needs are slightly different - you need gear that serves the virtual audience watching remotely. The three upgrades in this article still apply, but you'll need to position your microphone and camera to capture the in-person presenter clearly for remote viewers. Hybrid events add complexity, and if that's your primary format, you might need a dedicated hybrid equipment guide. This article focuses on fully virtual or primarily virtual events where you're presenting directly to an online audience.
Picture this: You're 5 minutes into your virtual workshop. You've spent weeks preparing your content. Your slides are perfect. Your examples are solid. You've rehearsed your opening three times. And then someone types in the chat: "Sorry, can barely hear you." Another chimes in: "Audio is really cutting out." Your confidence tanks. Your energy drops. The rest of the session feels like you're pushing a boulder uphill while apologizing for technical difficulties you don't know how to fix.
Here's the truth nobody tells you: Professional virtual events don't fail because of bad content. They fail because of bad audio, distracting visuals, or clunky presentation flow that makes attendees check out after 15 minutes.
And the industry wants you to believe fixing this requires a $5,000 investment in "professional equipment," a broadcast studio setup, and maybe a degree in audio engineering.
Spoiler: It doesn't.
What if three strategic upgrades - totaling under $200 - could completely transform how your events feel? Not "make do" improvements. Not "good enough for now" band-aids. Actual professional-grade results that make attendees forget they're on a virtual platform and focus entirely on your content.
I'm breaking down the exact three upgrades that changed everything for my clients - and myself. Real equipment names. Real prices. Real before/after results. No affiliate links, no upsells, no gatekeeping. Just the gear that actually works when you're running virtual events on a real solopreneur budget.
Upgrade #1: Audio That Doesn't Require Apologies ($60-$150)
Let's start with the truth bomb: Your laptop's built-in microphone was designed for Zoom calls with your mom, not professional presentations. It picks up every keyboard click, every dog bark, every HVAC hum, every notification ping. It makes you sound like you're speaking from inside a tin can at the bottom of a well. And here's the thing - attendees spend cognitive energy trying to understand you instead of absorbing your content.
Audio quality is the #1 factor determining whether someone stays or leaves your event. There's actual research on this. Berkeley found that people judge content quality based on audio clarity - even when the actual information is identical. Bad audio triggers an unconscious "amateur" assessment in attendees' brains. They assume your content must be lower quality too, even when you're brilliant.
So when the virtual event "experts" tell you that you need a $400 broadcast microphone, an audio interface, an XLR cable setup, and maybe a sound engineer on standby, they're either gatekeeping or selling something. What you actually need is one directional USB microphone that costs less than a nice dinner out.
The Upgrade Options:
Budget Option: Fifine Dynamic USB Microphone ($60-80)
Solid entry point for beginners
Plug-and-play simple
Dynamic pickup pattern (rejects background noise naturally)
Better Option: HyperX SoloCast ($80-100)
Gaming-grade audio quality (gamers are PICKY about sound)
Tap-to-mute sensor on top
Cardioid polar pattern with excellent background rejection
Best Option: Rode PodMic USB ($149-169)
Broadcast-quality sound that rivals $300+ XLR setups
Built-in pop filter
Robust metal construction
USB-C connection for modern laptops
What You're Actually Buying:
A directional (or cardioid) pickup pattern means the microphone focuses on your voice and ignores everything else. Your neighbor's lawn mower? Ignored. Your ceiling fan? Barely registered. Your keyboard clicks? Drastically reduced.
USB connection means plug it in and it works. No audio interface, no drivers, no XLR cables. Select it in your platform settings and start talking. The included desk stand keeps it stable at the right height.
Why I Don't Recommend My Own Setup:
Full transparency: I personally use a Blizzard MXL 900 condenser microphone with a Focusrite Scarlett Solo audio interface. But I'm NOT recommending that setup to you.
Why? Because I come from a theater background - I've sat behind multichannel mixing boards running live shows. To me, a simple one-channel interface feels like a step DOWN in complexity. It's easy and comfortable because of my technical background.
For you? It's unnecessary complexity and an extra $150+ you don't need to spend. The USB microphones I'm recommending above do the exact same job with zero learning curve. Plug in, select in settings, start talking. That's the setup you actually need.
Installation Reality Check:
Take microphone out of box, plug USB cable into computer
Open Google Meet (or Zoom) → Settings → Audio
Select your new microphone by name from dropdown
Position 6-8 inches from your mouth
Most mics have a gain knob on the side. Start in the middle. If people say you're too quiet, turn it up. If you sound distorted, turn it down. That's it.
Before/After Example:
I worked with a coach running regular workshops for professionals looking to level up in their industries. She had great content - 15+ years of experience, deep knowledge of strategies, excellent coaching frameworks. Her laptop microphone picked up her mechanical keyboard (she takes notes during sessions), her ceiling fan (home office in summer), and her neighbor's lawn mower (because of course it was always mowing day during her events).
Attendees kept asking her to repeat herself. The chat was full of "Sorry, what was that?" and "Audio is cutting out." Her energy would start high and visibly drop 20 minutes in when she realized people were struggling to hear her. Engagement tanked. Post-event surveys mentioned "technical difficulties" more than content quality.
We upgraded to a Fifine Dynamic USB mic ($69). That's it. One microphone. First workshop after the switch, the chat looked completely different: "Your audio is so crisp!" "This feels so much more professional." "I can actually focus on what you're saying instead of straining to hear."
Same content. Same presenter. Same valuable expertise. Different microphone.
The cost savings math: She was considering hiring a producer for $400 per event just to manage tech quality. The $69 microphone solved 80% of what she thought she needed production support for. She runs four workshops per year. That's $1,600 in producer fees eliminated by a $69 investment. ROI: 2,218%.
Permission Slip:
You don't need a $300 Shure SM7B broadcast microphone (that's what podcasters use to look impressive on Instagram). You don't need an audio interface. You don't need to understand the difference between XLR and USB or what "phantom power" means. You just need ONE directional USB microphone that costs $60-150 and makes you sound like you know what you're doing.
Rebel Action:
Next event, before you go live, ask someone you trust to join 5 minutes early. Have them listen to your audio with your laptop mic. Then switch to your new USB mic. Ask them which sounds more professional. The difference will astound you. You'll wonder why you spent six months apologizing for audio when the solution cost $69.
When NOT to Upgrade:
If you're primarily doing intimate 1:1 coaching calls where you and the client both understand tech limitations and the relationship is already established, laptop audio might be fine. Save the upgrade for group presentations where you're positioning yourself as an expert and first impressions matter. Also, if you present from coffee shops or coworking spaces regularly, hauling a microphone might be annoying - in that case, invest in good headphones with a built-in mic instead.
Upgrade #2: Lighting That Doesn't Make You Look Like a Hostage Video ($30-$100)
Let's talk about why you look like you're filming a ransom demand even though you're actually presenting valuable business content. Overhead lighting creates shadows under your eyes that make you look exhausted (even when you're not). Window backlighting turns you into a mysterious silhouette (very dramatic, very unusable). Single lamp lighting from one side makes you look like you're about to reveal the twist in a true crime documentary.
None of this is your fault. Room lighting was designed for living in spaces comfortably, not for presenting on camera to an audience evaluating your credibility in under three seconds.
Visual credibility happens faster than you think. Research shows people make competence judgments in the first three seconds of seeing someone on video. If you look dim, shadowy, unclear, or hard to see, attendees unconsciously downgrade their assessment of your expertise before you've said a single word. You're fighting an uphill credibility battle, and you don't even know it's happening.
The virtual event industry wants you to believe you need a three-point lighting setup with softboxes, color temperature controls, and maybe a lighting technician. You don't. You need one small adjustable light positioned correctly.
The Upgrade Options:
Bare Minimum: Ring light with tripod ($25-40)
Ubeesize or Neewer 10-inch models work fine
Clip-on or tabletop placement
Built-in dimmer and color temperature adjustment
Better Option: LED Panel Light ($55-80)
Lume Cube Panel Mini (often $55-60 on sale)
Elgato Key Light Mini
More natural-looking light than ring lights
Adjustable brightness and color temperature
Best Setup: Two small LED panels ($100-120 total) for key + fill lighting
Reduces harsh shadows
Creates dimension in your face
Professional studio look without studio complexity
What You're Actually Buying:
Adjustable brightness lets you dim for casual calls and brighten for presentations. Color temperature control adjusts between warm (casual/friendly) and cool (corporate/professional) - just a simple dial, no need to understand Kelvin ratings. Positioning flexibility is the secret: position at a 45-degree angle from your face (not straight-on), which creates dimension and eliminates harsh shadows.
My Actual Setup (What Works for Me):
I use an ALTSON Photography Video Lighting Kit - it's a pack of 2 tripod-mounted LED lights with color gel filters. I love it because the color gels let me adjust the mood and match my brand colors when I want to. But honestly? A single Lume Cube Panel Mini does 90% of the job for most people.
Don't overthink this. Start with one light. Add a second later if you want to eliminate shadows completely.
Installation Reality Check:
Plug into USB port or wall outlet
Position 12-18 inches from your face at 45-degree angle (think 10 o'clock or 2 o'clock on a clock face)
Turn on your camera in Google Meet or Zoom
Adjust brightness dial until you look natural - you should see details in your face clearly
Two lights? One at 10 o'clock, one at 2 o'clock. Eliminates shadows on one side of your face. Don't overthink the balance - just get them close and adjust by eye.
Test at the actual time you present. 2pm with afternoon sun needs different settings than 8am or 7pm.
Before/After Example:
An association executive was running monthly member Zoom calls - casual check-ins, updates, community building. She always presented from her home office with a large window behind her desk. Natural light is great for living, terrible for video. She looked like a backlit blob. Attendees could barely see her facial expressions. The vibe felt distant and impersonal despite her genuinely warm personality.
Member engagement on these calls was okay but not great. People showed up out of obligation more than excitement. In post-call surveys, nobody explicitly complained about lighting (because that feels nitpicky), but several people mentioned the calls felt "disconnected" or "hard to engage with."
We added a single Lume Cube Panel Mini ($56 on sale) positioned on her desk at a 45-degree angle. The transformation was immediate. Her face was clear. Attendees could see her smile, her reactions, her expressions when she got excited about member wins. Comments in the Zoom chat shifted from polite acknowledgments to actual engagement: "Love your energy today!" "This feels so much more connected."
The kicker: She'd been considering upgrading to a $150 Logitech Brio webcam thinking that was the problem. The webcam was fine. Even a decent laptop camera is fine if you have good lighting. The lighting was the entire issue.
Permission Slip:
You don't need a three-point lighting setup like a film studio. You don't need to understand color temperature science or what "soft light" versus "hard light" means. You don't need to become a cinematographer. You need ONE small adjustable light that costs $55-80 (often on sale for under $60) and makes your face visible in under three seconds.
Rebel Action:
Do a lighting test during your next event. Tell attendees you're testing something (transparency builds trust). Turn your light off mid-presentation for 30 seconds. Then turn it back on. Watch your own video feed in the corner of your screen. The difference will make you a believer. You'll see yourself go from "barely visible" to "clearly professional" instantly.
When NOT to Upgrade:
If you present from multiple locations weekly - traveling for work, bouncing between co-working spaces, presenting from client offices - hauling a light setup might be too annoying to maintain. In that case, learn to position yourself facing windows and present during daylight hours. Natural window light is free and works 80% as well as artificial lighting when used correctly. Just never sit with windows behind you.
Upgrade #3: A Webcam That Doesn't Make You Look Like a Minecraft Character (Optional $30-150)
Let's address the elephant in the virtual room: webcam quality. Everyone's suddenly obsessed with AI-powered tracking webcams that follow you around like a robotic stalker. The industry wants you to believe you need a $300 OBSBOT Tiny 2 with gimbal tracking or a $270 Insta360 Link that swivels and zooms.
Here's the truth: For most solopreneur virtual events, your laptop webcam is probably fine - IF you have good lighting. Remember Upgrade #2? That $56 LED panel does more for your video quality than a $300 webcam ever will.
But if you're consistently running workshops with 20+ attendees, if you move around during presentations, or if your laptop camera is genuinely terrible (some older business laptops have notoriously grainy webcams), here's what you actually need:
The Upgrade Options:
My Used/Refurbished Steal: Razer Kiyo Pro on eBay ($30 used, excellent condition)
THIS IS WHAT I USE
1080p at 60fps, adaptive light sensor that's basically magic in low light, adjustable field of view
I got mine for $30 on eBay in excellent condition and couldn't beat that price
New retail is $130-160, but the used market is flooded with these because streamers constantly upgrade
Budget Option: Logitech C920 ($50-70)
Industry standard for 10+ years
Still works great
Boring but reliable
Better Option: Razer Kiyo Pro ($130-160)
Full HD 1080p at 60fps
Smart auto-focus
USB 3.0 connection
AI Tracking (if you actually move around): OBSBOT Tiny SE ($99)
AI tracking at budget price point
Good if you pace while presenting
What You're Actually Buying:
1080p resolution (not 4K - platforms cap at 1080p anyway, so 4K is expensive theater). Adaptive light sensors automatically adjust to lighting conditions so you don't look washed out or shadowy at different times of day. Autofocus keeps you sharp when you lean forward or gesture. Wider field of view so attendees can see more of you and your space.
Real Talk: The Used Market is Your Friend
High-end webcams depreciate faster than laptops because content creators constantly chase the newest gear. This means you can snag a $150 webcam for $30-50 on eBay, or Facebook Marketplace, if you're willing to buy used in excellent condition. I've used my $30 Razer Kiyo Pro for over a 2 years with zero issues. Check the lens for scratches, verify it powers on, and you're golden.
The psychology here: paying $30 feels like nothing. Paying $150 for the same webcam feels like an investment you need to justify. But they deliver identical results.
Installation Reality Check:
Clip webcam to top of laptop/monitor, plug USB into computer
Open Google Meet (or whichever platform you are using) → Settings → Video → Select new webcam
Adjust angle so you're centered and eye-level
Done
Do You Even Need This Upgrade?
Honestly? Only if:
Your laptop webcam is genuinely terrible (grainy, low-resolution, makes you look like a Minecraft character)
You present to 30+ people regularly where visual professionalism impacts credibility
You move around during presentations and need AI tracking to stay in frame
You're doing hybrid events where remote attendees need to see you clearly on large screens
Before/After Reality Check:
I recorded the same 5-minute presentation snippet using my laptop's built-in webcam (which was perfectly respectable for its time) and then with the Razer Kiyo Pro. Both videos had the same lighting setup (my LED panel from Upgrade #2).
The difference wasn't night-and-day dramatic. It was subtle but noticeable: sharper details, better color accuracy, smoother motion when I gestured. Attendees didn't comment "WOW NEW CAMERA!" but they did stop asking if my internet connection was okay (spoiler: my internet was always fine; my laptop webcam just wasn't as crisp at 1080p).
The real value: the adaptive light sensor. On days when I present at 10am with bright window light versus 4pm when it's dim, the Kiyo Pro adjusts automatically. My laptop webcam makes me look washed out in bright light and shadowy in dim light. Small things. Adds up over dozens of presentations.
Permission Slip:
Most people upgrading equipment obsess over webcams when their real problem is lighting. Fix Upgrade #2 first. If your face is well-lit and clearly visible, your laptop webcam is probably fine for workshops under 50 people. Save the $30-150.
Rebel Action:
Before buying a webcam, record a 2-minute video using your laptop camera WITH your new lighting setup from Upgrade #2. Watch it back. If you look clear, professional, and easy to see, you don't need a new webcam. If you look grainy or pixelated even with good lighting, then upgrade - and check the used market first.
When NOT to Upgrade:
If you present from the same dedicated desk setup every single time and never move around (most of us don’t have “stage sized” areas), an AI tracking camera is an expensive theater upgrade you don't need. If your laptop webcam plus good lighting produces clear, sharp video, save your money. If the webcam upgrade delivers the smallest marginal improvement of all three upgrades - it's a "nice to have" not a "must have."
The math: I paid $30 for a webcam that retails for $130-150. I've used it for 50+ presentations. Cost per use: $0.60. Even at full retail ($150), spread across 50 presentations, that's $3 per event. Not life-changing, but not nothing either - especially when combined with the audio and lighting upgrades that deliver bigger impacts.
The Math That Matters: What These Upgrades Actually Return
Let's talk about the investment - real numbers, real comparisons, real ROI.
The Investment:
USB Microphone: $69 (Fifine Dynamic or HyperX SoloCast)
LED Panel Light: $56 (Lume Cube Panel Mini on sale - regularly $60-70)
Webcam (Optional): $30-150 (Used Razer Kiyo Pro $30-60, or new options $130-150)
Total Equipment Cost (without webcam): $125
Total Equipment Cost (with webcam): $155-275
What You're Comparing Against:
Option A: "I'll just hire it out"
Event producer for tech management: $400-$800 per event depending on event length and complexity. If you run quarterly events (4 per year), that's $1,600-$3,200 annually.
After your first or second event, your $125-275 equipment investment has completely paid for itself. And you own the gear forever. You can use it for 50 events, 100 events, 500 events. The producer fee repeats every single time.
Option B: "I'll invest in the corporate-grade equipment the pros use"
Broadcast microphone (Shure SM7B): $400
Audio interface: $150-$200
XLR cable: $20-$30
Professional lighting kit: $400-$800
4K webcam with AI: $200-400
Total: $1,200-$1,900 equipment
You don't need this for 90% of virtual events. The quality difference between a $69 USB mic and a $400 broadcast mic is barely noticeable to attendees listening on laptop speakers or wireless earbuds while checking email. Same with lighting - $56 LED panel vs. $600 kit makes minimal difference for virtual workshops.
The $125-275 setup gets you 90% of the results for 8-15% of the cost. The industry makes money selling premium equipment and calling budget options "unprofessional."
Real Client Impact:
Career Coach (from earlier):
Was considering hiring a $400/event producer just to handle tech quality
Spent $69 on a microphone instead
Runs 4 workshops per year = $1,600 saved annually
ROI: 2,218% return in year one
Association Executive (from earlier):
Was about to buy a $600 Logitech Brio 4K webcam
Spent $68 on lighting instead
Member retention increased (fewer "can't see you" complaints, higher post-call satisfaction scores)
Intangible but significant: Credibility improvement led to increased willingness to attend future calls
You're Closer Than You Think
Professional virtual events don't require $10K budgets, production studios, or corporate equipment partnerships. They require strategic investments in audio clarity, visual credibility, and (optionally) webcam quality.
The recap:
Audio upgrade: $60-$150 eliminates the #1 attendee complaint
Lighting upgrade: $30-$100 establishes visual credibility in 3 seconds
Webcam upgrade (optional): $30-150, only if your laptop camera is truly inadequate with good lighting
Total investment: $125-275
You don't need broadcast-quality equipment or a production team. You need two strategic upgrades (plus an optional third) that cost less than two months of a gym membership.
The solopreneur who tells you virtual events require $5K in equipment is gatekeeping. The industry expert who insists you need corporate-grade tools is selling something. The business coach who says "just be more engaging!" without actual tools is useless.
Next step: Pick one upgrade. Order it this week. Test it in your next event. Feel the difference when you're not worried about technical credibility. Notice how attendees respond when they can hear and see you clearly.
Then come back and tell me I'm wrong about the $10K myth. I'll wait.
Ready to stop figuring this out alone? Sometimes you don't need all the equipment - you need someone in your virtual cockpit handling tech while you focus on delivery. Book a free 20-minute consultation and let's talk about what your next event actually needs.
Connect with me on LinkedIn

